

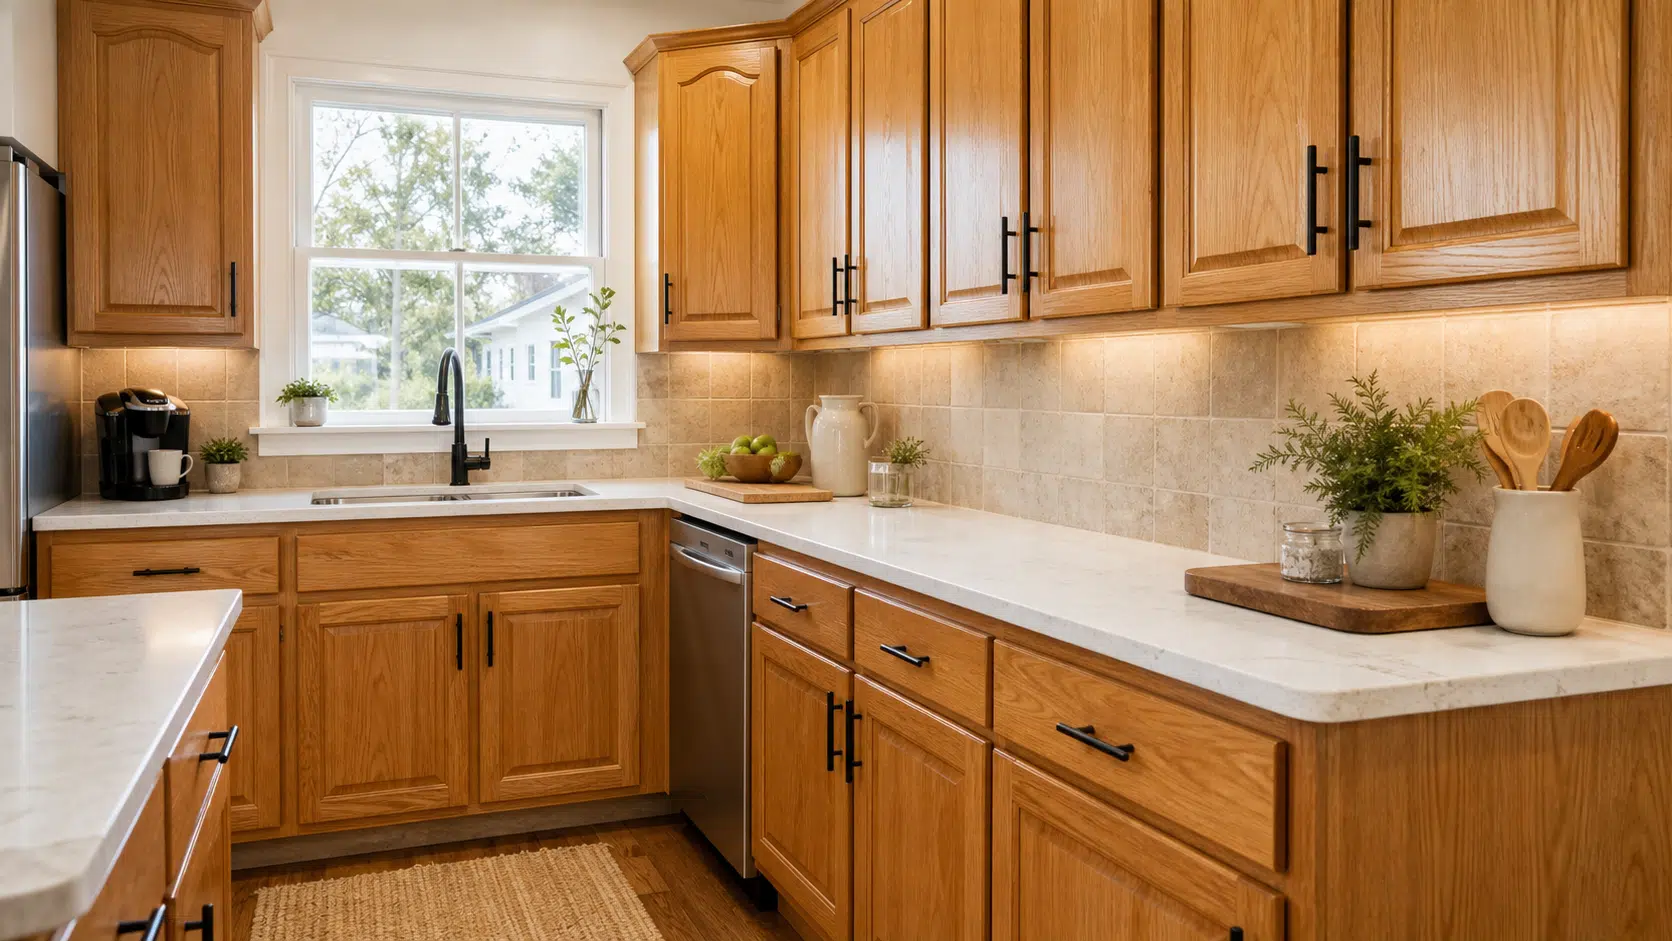

Honey oak cabinets can be tricky to work with. Their warm color and visible grain give a kitchen character, but the same features can also make the room feel visually heavy if the surrounding finishes, hardware, and lighting are fighting against them.
Painting is one option, but it is not the only one. If you want a less permanent update, a smaller weekend project, or a way to keep the wood visible, there are several routes worth comparing before you pick up a brush. Some focus directly on the cabinet doors. Others change the surfaces and objects around the cabinets so the oak reads as part of a deliberate design rather than a leftover finish.
Start With The Fastest Cabinet Changes
The quickest updates are usually the ones that change what your eye notices first: hardware, door fronts, and cabinet openings. These projects vary in cost and commitment, so it helps to decide whether you want a reversible change or a more built-in look.
| Update | Best For | Tradeoff |
|---|---|---|
| New hardware | A fast, low-disruption refresh | Old drill holes may limit your choices |
| Cane inserts | Adding texture while keeping wood tones | Requires careful measuring and attachment |
| Open shelving | Reducing visual weight on upper cabinets | Contents stay visible and need editing |
| Peel-and-stick coverings | Testing color or pattern without paint | Durability depends on product and installation |
| Pull-out shelves | Improving access in lower cabinets | More carpentry work than a surface refresh |
Swap Out Dated Hardware
Hardware is often the best first move because it changes the cabinet face without changing the cabinet itself. If the existing pulls or knobs feel tied to an older kitchen style, replacing them can make the oak look more considered.
Matte black pulls can create a sharper contrast against warm wood, while bronze or aged brass can lean into the cabinet color instead of fighting it. Shape matters as much as finish. Slim bar pulls, simple knobs, and cleaner profiles usually feel more updated than ornate shapes with a lot of curves or detailing.
Before buying, measure the distance between existing screw holes if you are replacing pulls. Choosing the same center-to-center spacing can save patching, drilling, and visible repair work.
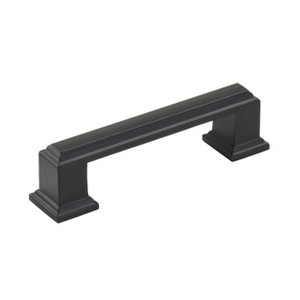
Matte Black Cabinet Pulls
A simple matte black pull can sharpen the look of honey oak cabinets without changing the wood. Match the center-to-center screw spacing to your existing holes when possible to avoid extra drilling or patching.
As an Amazon Associate I earn from qualifying purchases.
Add Cane To Select Cabinet Doors
Cane webbing can add texture to honey oak cabinets without hiding the wood completely. It works best when used selectively, such as on a few upper cabinet doors or a pantry-style section, rather than across every surface in the room.
A typical cane cabinet project involves removing the door panel or attaching cane to an inset area, then trimming it cleanly once it is secured. Some cane webbing projects call for soaking the material before installation so it can tighten as it dries, but instructions vary by product and cabinet design. Follow the material directions and test the layout before committing to glue, staples, or trim.
This is a better fit for someone who wants a warmer, more handmade look than a sleek modern one. It also pairs naturally with simple hardware and a less cluttered counter setup.
Try Open Shelving Where The Upper Cabinets Feel Heavy
If the kitchen feels dominated by rows of upper honey oak doors, removing some doors or converting a section to open shelving can make the wall feel lighter. This does not have to mean giving up all closed storage. In many kitchens, keeping the lower cabinets intact and opening only a small upper section is enough to change the balance.
Open shelves work best when they hold everyday items that look cohesive together: white dishes, glassware, wood bowls, or a restrained mix of useful pieces. If the shelves become a place for mismatched extras, the kitchen can feel busier than it did before.
Use Peel-And-Stick Coverings Carefully
Peel-and-stick film or vinyl wrap can be useful if you want to test a color, cover a limited area, or make a renter-friendly change. It is not the same as professionally refacing cabinets, and the finished look depends heavily on the quality of the material and how neatly it is applied.
For the cleanest result, remove doors and hardware, measure each surface carefully, and smooth the covering slowly to avoid bubbles and crooked seams. Heat can help some vinyl products conform to edges, but use the method recommended by the specific product. This is a practical option for a temporary refresh, but it may not be the right answer for high-wear doors in a busy kitchen.
Remove Lower Doors And Add Pull-Out Shelves
For lower cabinets, a visual update can also improve function. Removing a door and installing a pull-out shelf or drawer-style insert can make pots, pans, and small appliances easier to reach. This works especially well in deep base cabinets where items tend to disappear toward the back.
The project requires accurate measurements and drawer slides that fit the cabinet opening. A basic version uses side supports, slides, and a shallow box or tray built to fit the space. Soft-close slides can make the finished piece feel more polished, but the important part is matching the hardware to the load it needs to carry.

Pull-Out Cabinet Organizer
A pull-out organizer can make lower cabinets easier to use, especially for pots, pans, or pantry items stored near the back. Measure the cabinet opening, depth, and clearance before choosing a kit.
As an Amazon Associate I earn from qualifying purchases.
Change The Details Around The Cabinets
You do not always have to alter the cabinets to make honey oak look better. Backsplash, lighting, counter accessories, and nearby finishes can either exaggerate the orange tone or make it feel warmer and more balanced.
Add A Backsplash That Works With Warm Wood
A backsplash can shift the whole kitchen because it sits directly between the upper and lower cabinets. Soft whites, warm neutrals, handmade-looking tile, clay tones, and subtle veining can calm the space while still letting the oak stay visible.
Cool grays and strong blue tones can be harder to pair with honey oak because they may emphasize the wood’s warmth by contrast. That does not mean they are impossible to use, but they need to be chosen carefully with the counters, flooring, and lighting in mind.
If you are comparing tile samples, hold them against the actual cabinets at different times of day. Honey oak can look different under morning light, overhead bulbs, and evening shade.
Use Accessories With Intention
A honey oak kitchen often looks more dated when the counters are crowded with unrelated colors, plastics, and small appliances. Editing the visible items can make as much difference as adding something new.
Materials such as rattan, brass, ceramic, glass, and wood can sit comfortably beside oak. Warm natural colors, including ivory, terracotta, olive or deep green, and muted earthy tones, tend to feel more connected to the cabinet color than stark or icy finishes.
That does not mean every object needs to match. The goal is to make the visible pieces feel chosen. A utensil crock, a fruit bowl, a cutting board, and a few useful countertop items can support the kitchen’s palette without turning the counters into a display shelf.
Upgrade The Lighting
Lighting can make honey oak look richer or more orange depending on the bulbs, fixture placement, and amount of shadow in the room. Warm, inviting light usually suits wood cabinetry better than harsh, cool light, especially in kitchens with a lot of cabinet surface.
Consider whether the room needs better task lighting under cabinets, a pendant over an island, or a fixture that spreads light more evenly. Natural light also matters. Clean, unobstructed windows and a less cluttered sill can make the room feel brighter without adding another finish.
Glass-front details, reflective surfaces, and lighter surrounding colors can also help keep the kitchen from feeling weighed down by wood.
Consider More Decorative Or Semi-Permanent Updates
Some projects sit between a quick refresh and a full renovation. They take more effort than swapping hardware, but they can make the cabinets feel more custom.
Add Bobbin Trim For A Playful Detail
Bobbin trim, bead trim, or small half-round wood details can change the shape of plain cabinet doors. Applied along the edges, the trim gives the doors a more decorative profile and can draw attention away from dated beveling.
This is a style-specific choice. It works best if you want a cottage, vintage, or playful look, and it may feel too busy in a kitchen that already has strong grain, patterned counters, or a detailed backsplash. If you try it, test the trim on one door or a removable sample board before adding it across the kitchen.
Stain Instead Of Paint
Staining is not paint-free in the sense of being effortless, but it does preserve the idea of visible wood. If the cabinet color is the main issue, stain may help shift the tone while keeping the grain in view.
The right approach depends on the existing finish. Cabinets usually need thorough cleaning, and some projects require sanding or finish removal before stain can absorb evenly. Water-based stains are often chosen for easier cleanup and lower odor, while oil-based stains are commonly used when deeper penetration and longer working time are priorities. Product instructions and proper ventilation matter with either type.
Because honey oak already has strong warmth, test stain in an inconspicuous area or on a matching sample before doing every door. A stain that looks subtle on a swatch can read very differently across a full wall of cabinetry.

Water-Based Wood Stain
Water-based stain can shift the tone of wood while keeping grain visible, but honey oak can change color dramatically across a full wall of cabinets. Test the stain on a hidden area or sample board before committing.
As an Amazon Associate I earn from qualifying purchases.
How To Choose The Right Update
The best paint-free update depends on what bothers you most about the kitchen. If the cabinets feel dated but the room functions well, start with hardware and lighting. If the oak feels overwhelming, look at open shelving, a backsplash, or better counter styling. If the cabinet doors themselves feel too plain, cane, trim, vinyl, or stain may be worth considering.
For a low-risk sequence, work from easiest to most permanent:
- Clear and edit the countertops so the cabinet color is easier to judge.
- Change the lighting or bulbs if the wood looks too orange or dull.
- Replace hardware using existing screw spacing where possible.
- Test backsplash samples, peel-and-stick film, cane, trim, or stain before applying them widely.
- Move into carpentry projects, such as pull-out shelves or door removal, once you know the direction works.
Honey oak does not have to be hidden to look intentional. The strongest updates usually come from making the rest of the kitchen cooperate with the wood: cleaner hardware, warmer supporting materials, better light, and fewer visual distractions.